External Email Warning With PowerShell

Ok, so you’ve figured out that you need to add a banner to any emails that flow into or out of your Exchange Online environment. The process is slick, you take the time to click every button and tweak every option, but how on earth do you build that to a scale that will work for you in the future? How do you accurately document the criteria and the relevant messages to fulfil your Change Control requirements?
The good news is that your friend PowerShell is here to help you with all of those challenges, so let’s get going!
Prerequisites
This is a follow along tutorial and you will only require a few things:
- A Windows 10 PC installed with the latest version of PowerShell.
- Exchange Online PowerShell Module
- Organizational Management permissions in Exchange Online
Building Out the PowerShell Statements
You’ll no doubt be keen to get starting with this script, but let’s take this a piece at a time so that you don’t get overwhelmed.
-
Start by connecting into Exchange Online using
Connect-ExchangeOnline -UserPrincipalName [email protected] -
You’ll be prompted for a password and you’ll also need to satisfy your organization’s MFA requirements.
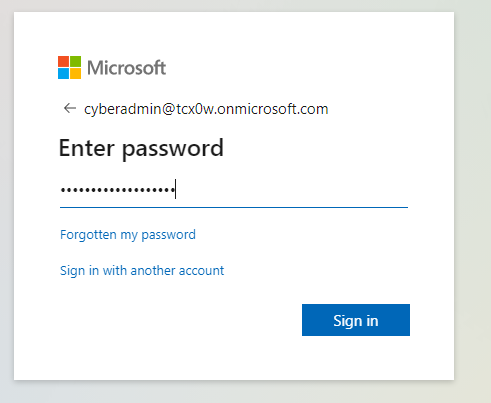
Sign In to Exchange Online
-
Now, load the HTML message into a PowerShell variable
1$HTMLmessage = '<!-- Red Banner --> 2<table border=0 cellspacing=0 cellpadding=0 align="left" width="100%"> 3 <tr> 4 <td style="background:#ff0000;padding:5pt 2pt 5pt 2pt"></td> 5 6 <td width="100%" cellpadding="7px 6px 7px 15px" style="background:#ff000;padding:5pt 4pt 5pt 12pt;word-wrap:break-word"> 7 <div style="color:#000000;"> 8 <span style="color:#000000; font-weight:bold;">Caution:</span> 9 This is an external email and may be malicious. Please take care when clicking links or opening attachments. 10 </div> 11 </td> 12 </tr> 13</table> 14<br />' -
Now, you need to execute the main PowerShell command that sends the HTML code into Exchange Online
1New-TransportRule -Name "External Email Warning" ` 2 -FromScope NotInOrganization ` 3 -SentToScope InOrganization ` 4 -ApplyHtmlDisclaimerLocation Prepend ` 5 -ApplyHtmlDisclaimerText $HTMLmessage ` 6 -ApplyHtmlDisclaimerFallbackAction Wrap 7Write-Host "Transport rule created" -ForegroundColor Green -
Once you have executed the PowerShell command a LOT of text will fly up the screen, the key thing you’re looking for at this point is the magic words Transport Rule Created at the end of the text.

PowerShell Results when Creating a Transport Rule
-
Now, go to the Exchange Online Admin Console and navigate through Mail Flow and Rules. Ensure that the correct rule is selected, then click the pencil icon to edit the rule.
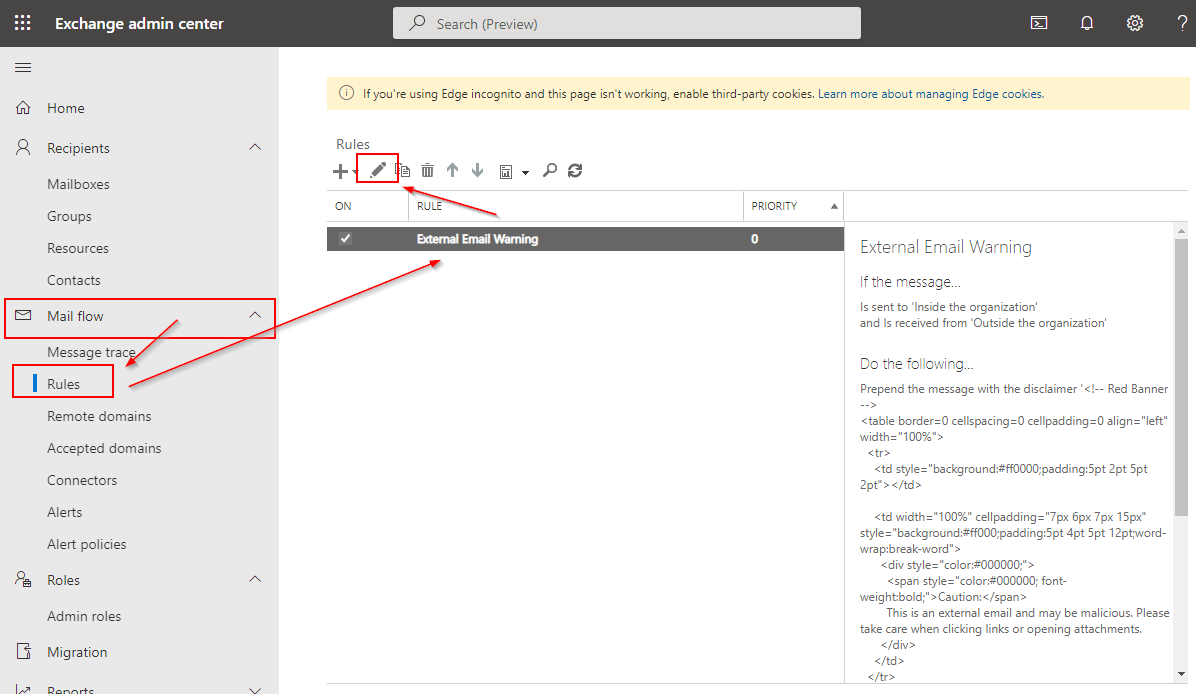
Edit the Transport Rule in Exchange Online
-
With the rule on screen, review it and ensure that it is all configured as you’d expect based upon the PowerShell code that you’ve just executed.
That’s it! Your rule is created and is now live within your organization.
Updating the HTML (Examples)
It is important that you occasionally vary your alert messages so that your users do not get blind to them, equally, make sure that you don’t change them too much so that they’re not recognizable.
The example that you see in the section above is HTML and is therefore editable in most text editors. If you prefer to have a more visually appealing way to view the HTML whilst editing, use something like Visual Studio Code.
Example 1
For all important warnings and alerts RED is a key color. Use the following example HTML code to have a discrete banner with a red stripe.
 1<table border=0 cellspacing=0 cellpadding=0 align="left" width="100%">
 2  <tr>
 3    <td style="background:#ff0000;padding:5pt 2pt 5pt 2pt"></td>
 4
 5    <td width="100%" cellpadding="7px 6px 7px 15px" style="background:#ff000;padding:5pt 4pt 5pt 12pt;word-wrap:break-word">
 6      <div style="color:#000000;">
 7        <span style="color:#000000; font-weight:bold;">Caution:</span>
 8        This is an external email and may be malicious. Please take care when clicking links or opening attachments.
 9      </div>
10    </td>
11  </tr>
12</table>
13<br />
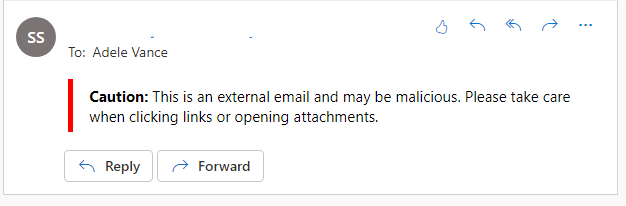
Example HTML Banner 1
Example 2
When discrete just won’t cut it, use a yellow background and a red stripe.
 1<table border=0 cellspacing=0 cellpadding=0 align="left" width="100%">
 2<tr>
 3    <td style="background:#a50707;padding:5pt 2pt 5pt 2pt"></td>
 4    <td width="100%" cellpadding="7px 6px 7px 15px" style="background:#fdf917;padding:3pt 4pt 3pt 12pt;word-wrap:break-word">
 5        <div style="color:#222222;">
 6            <span style="color:#222222; font-weight:bold;">Important:</span>
 7        This is an external email and may be malicious. Please take care when clicking links or opening attachments.
 8        </div>
 9    </td>
10</tr>
11</table>
12<br />
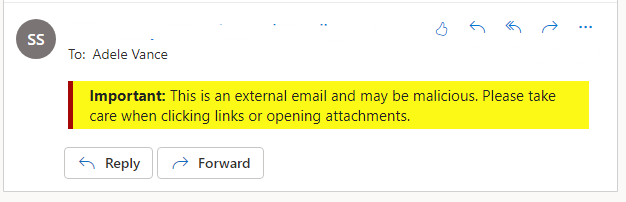
Example HTML Banner 2
Example 3
When an alert is important but doesn’t require an urgent notification you can use a dark blue stripe with a soft blue background color.
 1<table border=0 cellspacing=0 cellpadding=0 align="left" width="100%">
 2    <tr>
 3        <td style="background:#0031d2;padding:5pt 2pt 5pt 2pt"></td>
 4        <td width="100%" cellpadding="7px 6px 7px 15px" style="background:#f9fafa;padding:5pt 4pt 5pt 12pt;word-wrap:break-word">
 5            <div style="color:#222222;">
 6                <span style="color:#222222; font-weight:bold;">Caution:</span>
 7            This is an external email and may be malicious. Please take care when clicking links or opening attachments.
 8            </div>
 9        </td>
10    </tr>
11</table>
12<br/>
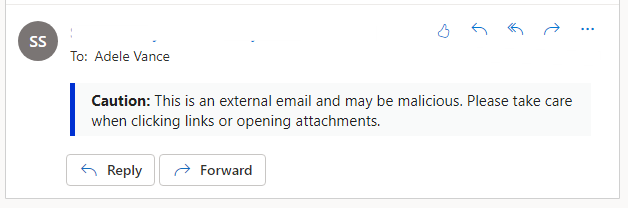
Example HTML Banner 3
Conclusion
Wasn’t that easier than you’d originally thought? The mere thought of PowerShell makes some users quake in their boots, but when you break anything down into small steps it becomes much easier to manage.
Using the power of the shell really helps take the sting out of these kind of tasks. Using your new-found knowledge what will you streamline next?