Finding when your users are in a Data Breach

Finding when your users are in a Data Breach
So you’ve bought a new domain name and set up your new website, what’s next? One of the up-front tasks that many people do is to create a Data Breach alert with Troy Hunt’s Have I Been Pwned service. But if you’re running a domain, it can quickly become cumbersome to ask each of your users to create an alert, and then act when a breach notification comes through.
So what do you do?
To combat this, you can quickly and easily create a domain-wide Data Breach notification so that you, the administrator, gets notified so that you can act decisively when the time comes.
Prerequisites
This is an instructive tutorial, and if you intend following along, you’ll need the following:
- A Domain name that you have registered - this tutorial uses AllAboutTheCybers.com
- Access to your DNS registrar - this tutorial uses Cloudflare
Understanding the Data Breach landscape
Unfortunately, a Data Breach happens each and every day. Be it a misconfigured S3 bucket, a SQL injection attack or a simple misconfiguration with a service provider.
Understanding what this means in advance of the event puts you and your business in the best possible position to minimize damage caused.
Aside from using strong and unique passwords for every website you visit you also need to know when your data has been exposed and what information was shared. In steps Troy Hunt to help you out.
Setting yourself up for success when all else fails
Let’s start off by registering your domain on the Have I Been Pwned service. This process is fairly painless and should take you no more than a few minutes to do.
Registering your domain on the Data Breach service
-
Open your browser and visit the Have I Been Pwned website and click on Domain Search. Start a Domain Search

Domain Search
-
Enter AllAboutTheCybers.com into the domain name field (substitute this for your own domain name)
-
Ensure that Subscribe me is checked
-
Add an Email Address to receive the alert for every Data Breach notification. This could be your administrator account or your IT security team depending upon the size of your business.
-
Confirm you’re not a robot.
-
Click Begin Verification to continue. Begin Domain Verification
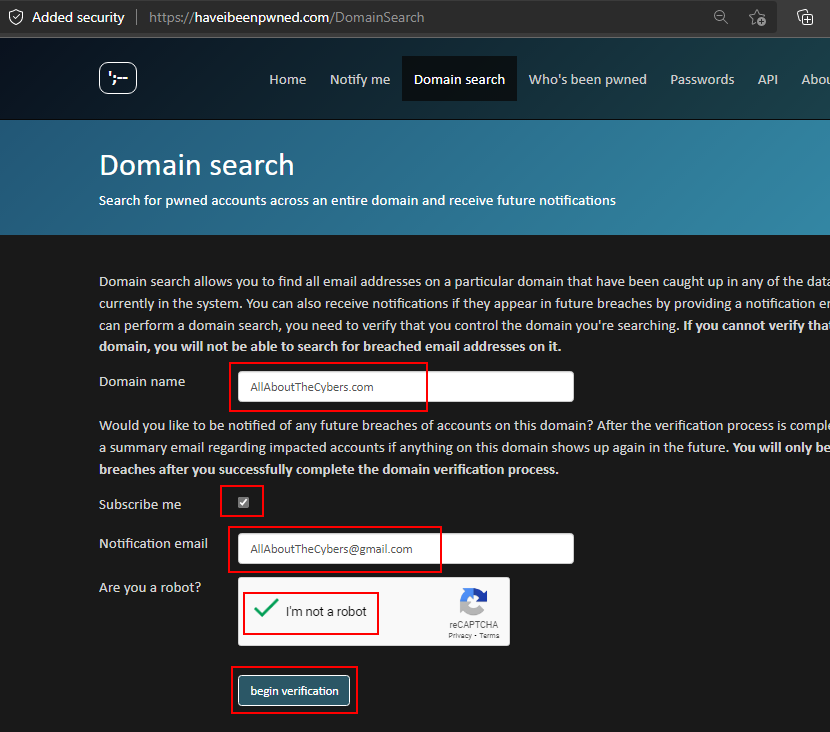
Domain Name Search
Confirming your domain
Once you’ve completed the registration steps on the Have I Been Pwned website, you’re asked to choose which type of verification method you want to use. There are three different methods to choose from, and your choice could be dependent upon your hosting provider.
Verify by email
You would use the verify by email option if you already have a preconfigured email address at your domain name.
-
Select [email protected], or one of the other addresses that are relevant at your domain.
-
Click send verification email to continue. Verify by email
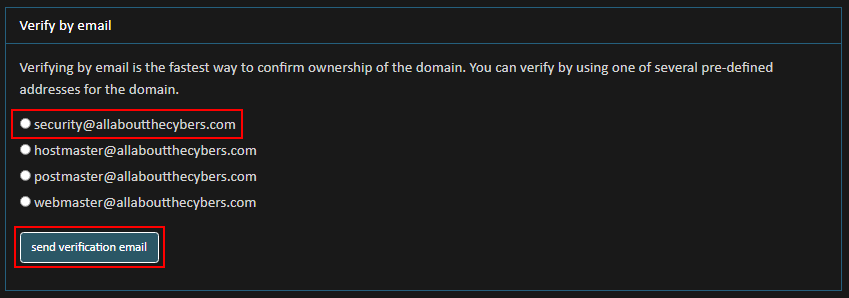
Verify by email
-
Head over to your email account ensuring that you leave your browser open, and open the email. Copy the unique identifier that you’ve been sent and head back to your browser. email confirmation of registration
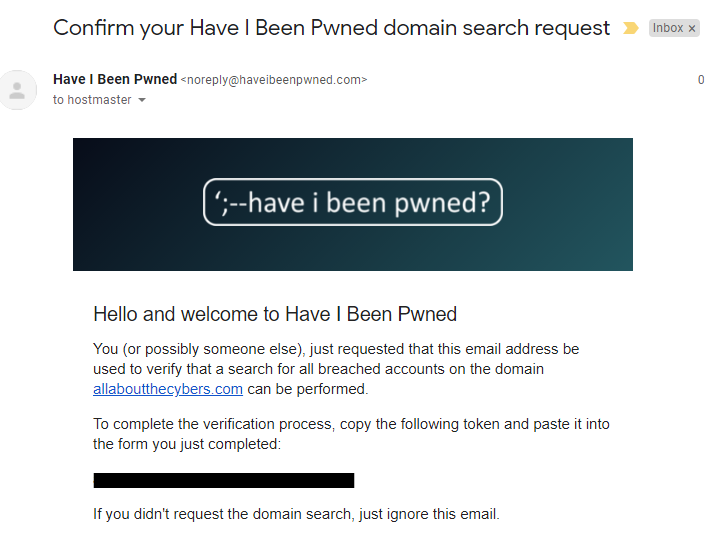
Receive a verification email
-
Paste the unique identifier into the website and click verify token.
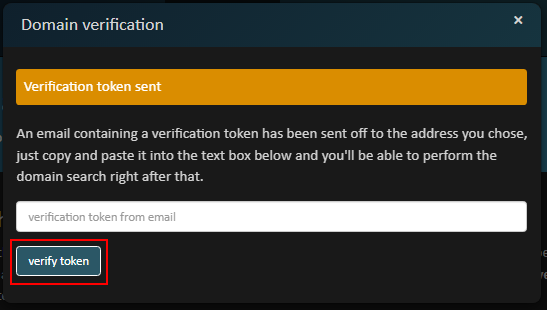
Domain Verification
Verify by meta tag
If you don’t have one of the listed email accounts, then maybe a meta tag is the preferred way to go for you.
-
Copy the pre-created meta tag and open your website editing tool.
-
Paste in the meta tag, save and upload.
-
Once you’ve manually confirmed the meta tag is displaying in the source code, come back to the website and click verify meta tag.
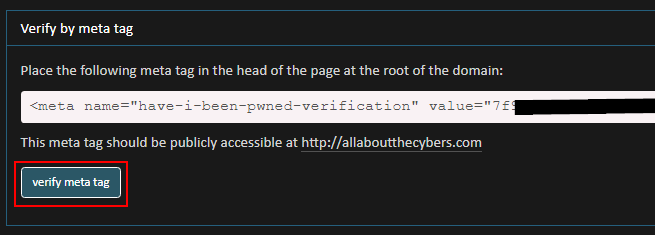
Verify by meta tag
Verify by file upload
It’s possible that you don’t want to add meta tags to your website’s head, maybe a simple file upload is more of your thing.
-
Open your editor of choice, paste in the content from the website and save the file with the name have-i-ben-pwned-verification.txt.
-
Upload the file to your hosting provider and manually attempt to open the file to ensure that it is publicly accessible.
-
Head back to the website and click verify file upload. Verify by file upload
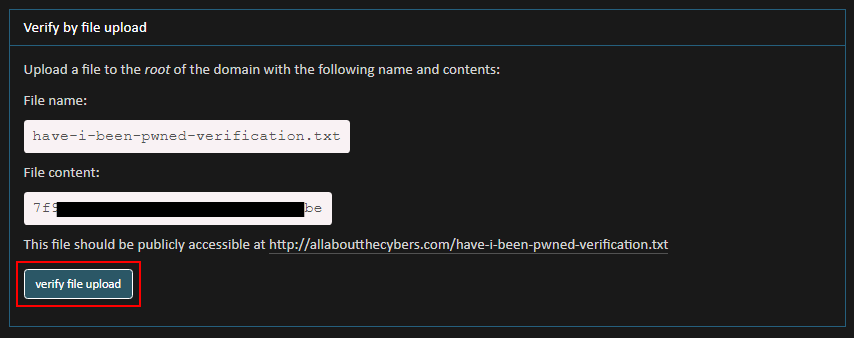
Verify by file upload
Verify by domain TXT record
This is possibly the quickest and easiest method of domain verification so long as you have access to the DNS control panel for your website.
-
Copy the information from the website verify by domain TXT record
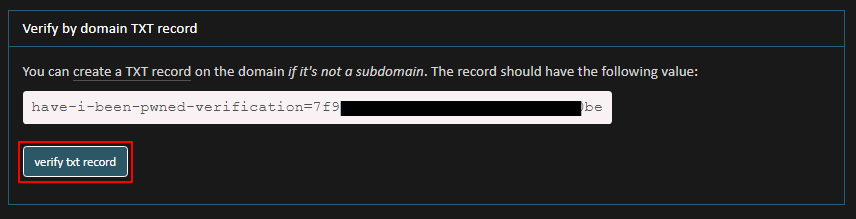
Verify by Domain TXT record
-
Open your browser and head over to your Domain Registrar, in this example Cloudflare. Sign in as usual and head to the DNS setting section.
-
Click Add Record, Choose TXT as the record type, enter @ to denote that you want to use the root of the domain. Paste the value from the Have I Been Pwned website, and lastly click Save. Add TXT DNS record
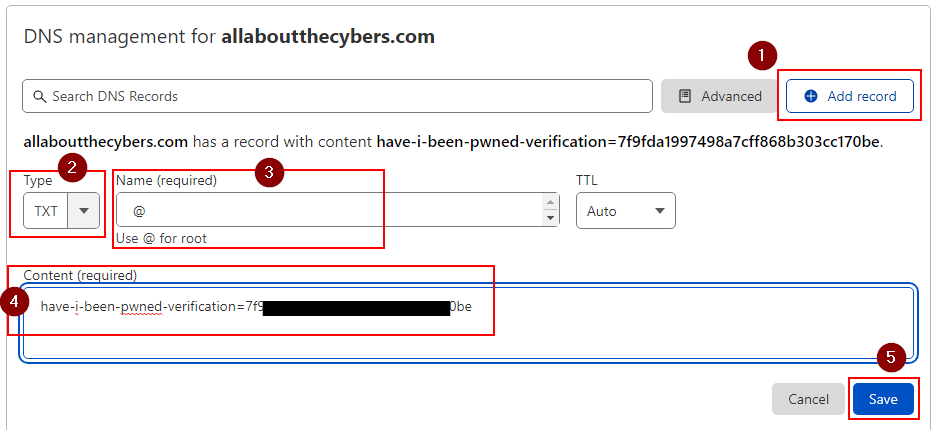
Adding a DNS record
-
Allow some time to pass, in our tutorial no more than two minutes have passed, then open a PowerShell prompt.
-
Enter
nslookup -type=txt allaboutthecybers.com 1.1.1.1and press enter.
💡 Learn more about the nslookup command
-
Look at the output and verify that you see the same text that you’ve just entered, then head back to the Have I Been Pwned website to click verify txt record.
-
The Have I Been Pwned website now checks your DNS records and, if it successfully finds the new record, it’ll display verification successful and offer you three different types of downloadable file. These files will contain the same information, just in different formats, to suit your needs. Verification successful
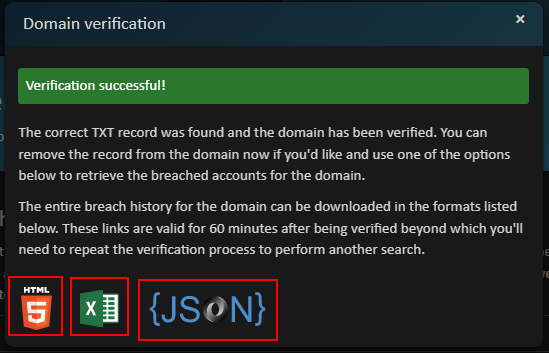
Domain Verification
-
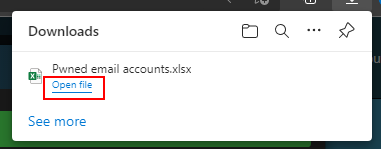
Click on the Excel logo to download and open the data in excel format download the Data Breach notification
Download pwned email accounts
-
Once Excel has opened, you’ll hopefully see that none of your accounts have ben pwned, this is represented by an empty file. Review your Data breach file
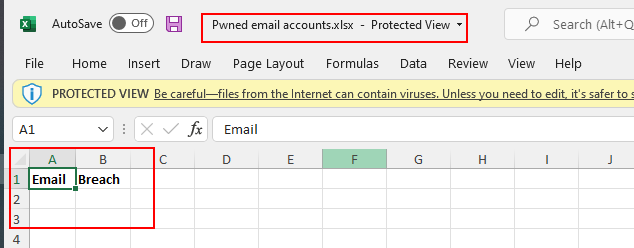
Review Pwned email accounts
Acting on Data Breach notification alerts
Occasionally you’ll receive an email from the Have I Been Pwned service notifying you that one or more of your accounts has been included in a Data Breach. Your notification email will include details of the breach itself and a link to download the email addresses that are involved.
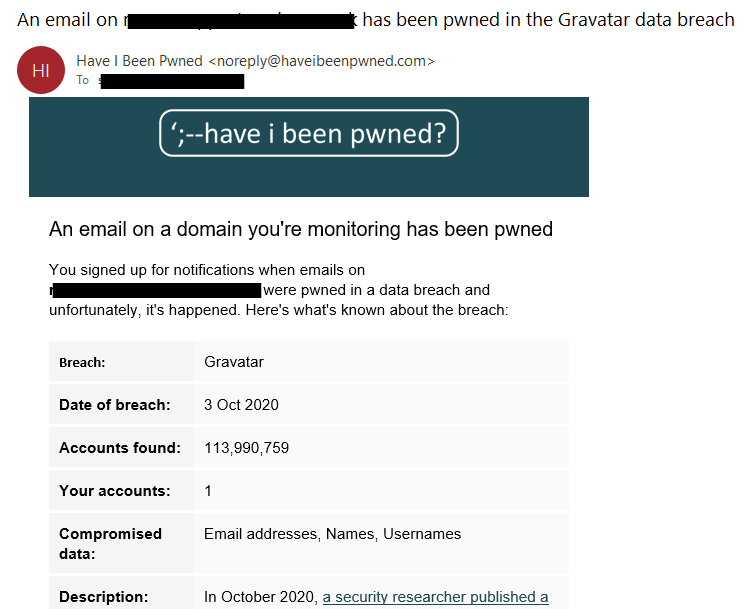
Data Breach notification email
Conclusion
As the administrator or owner of your website you’ll now have a clear picture of any breaches that your accounts are involved in, and you’ll also be notified if you’re involved in a Data Breach in the future.
If you’re not interested in checking your whole domain, you can check a single email address for data breaches.